Friday, 1 March 2013

Hair Bun DIY

Last night I decided to try my hand at making a hair piece in the shape of a bun that I could use to create late 50s/early 60s hair styles. The result was this:


It was super easy to make and only took about 20mins. Here's what I used: a sponge donut (the bigger the donut the bigger the bun, clip in hair extensions to match my hair colour (they don't have to be human hair, cheap synthetic one are fine), scissors, needle and thread.


Clip one extension weft on to the inside of the sponge donut at a time, and wrap the hair around. Sew into place on the inside only so no stitches are seen from the outside. Keep going until the whole donut is covered well and no longer visable. I used a little hairspray at the end to smooth down any flyaways.
 
I turned the donut inside out for this pic to show you how to attach the weft


Hair pieces were quite popular in the late 50s right through to the late 60s. They were used to add height and volume to upstyles and often featured barrel curls. The ladies own hair would be pinned up into either a French Roll or even left out (the late 50s saw the introduction of the 'bob', so if her hair was left out it would be flicked up at the ends in most cases) and the hair piece would sit up on the crown of her head. With the 'beehive' becoming popular, women would often use a hair piece to achieve the height they wanted.
 
So, to achieve a late 50s look, i went with a small Fench Roll for my own hair, then added the hair piece/bun ontop. I teamed it with a rolled fringe (see my earlier blog 'Fake It 'Til You Make It' on how to do these) and polished it off with a silky scarf, here's the final result


This will come in very handy as my own hair is too short to put into a bun. I'm looking forward to creating more styles using my new hair piece, so keep your eyes peeled :D

Monday, 4 February 2013

How To Do a Vintage Manicure

We've been colouring our nails since Ancient China. But did you know nail polish as we know it today is all thanks to the development of car paint? This came about during the 1920s.

The style of nail polish we most associate as vintage, is the bare moon manicure. This is were the lunula (white moon shaped spot below your cuticle) of the nail is left unpainted. While the rest is painted usually red.

Here's how to do it perfectly every time:

Start by shaping your nails, an oval shape was the most popular while pointed was a little more rare.


Grab some circle/spot stickers from any cheap shop. Place them ontop of your cuticle covering your lunula. You can place these as far down your nail as you like, the closer you put it to your cuticle the smaller the bare moon result.
 
 
Now you can choose your polish. This is my all time fave nail polish, BYS. It's cheap as chips, goes on smooth and last really well. I've chosen to wear 'Cherry Red'.
 
 
Apply 2 coats to your nail, and don't worry if you get some on the sticker. If you get some on your skin as we all do, don't worry you can use a cotton tip to remove it later. 


Remove the stickers and apply a clear top coat over your entire nail.


All finished! How pretty do they look now? You can use any colour polish you like to give this look a more modern twist. Why, you could even pain the entire nail one colour, then do this with another colour, leaving the first colour showing instead of being bare.

Tuesday, 29 January 2013

Miss Rockabilly: Dead Gorgeous Hair & Makeup Styling

Miss Rockabilly: Dead Gorgeous Hair & Makeup Styling: Hello fans! To kick off 2013 we have another wonderful interview for you ! Love pin up hair and make up? Well this post is for you . If y...


Had trouble re blogging this so here's the link to read the whole interview: http://www.missrockabilly1.blogspot.com.au/

Saturday, 26 January 2013

Fake It 'Til You Makei It!


This style of fringe/bangs is so popular, and i get asked alot how to do it. So here's a lil tutorial for you gals :D


Here's what you need:
- Tail comb
- Bobby Pins
- Fringe/Bun Pins
- Hair Rat (I use a bun donut as pins go in easy)
 
 
You'll need to cut your bun donut into the length you want your rolled finge/bangs
 
 
Start by sectioning your hair. If you don't have a fringe/bangs, grab a section from the front of your hair roughly 2 or 3 inches back (I'm growing out my Betty Page fringe, so i'm just using that)
 
Place your newly made hair rat towards the end of your section, making sure the ends are tucked in

 Rolling under, keep rolling until you reach your hair line
 
 Secure with a couple bobby pins
 
Gently spread your hair along the rat to disguise the ends of it. (If you have black hair this is super easy if you're using a black rat, no one will even know it's in there). Secure with bun pins/fringe pins whatever you want to call them

 
Spray a little hairspray and smooth any fly aways, then spray again

 Almost done!


Add a cute scarf or bandana and VIOLA!!! You're finished :D 
 
 
I'll show you what to do with the back next time...my hair's still wet today, i only blow dried the front so i could do this tute ;P

Pretty Pinup Makeup

This time i decided to do my usual look, the vintage pinup style, all using Dead Gorgeous Cosmetics.
Never mind my hair, that's my next blog ;p
 
 
First i apply a mattifying primer to give me a true vintage feel...plus it helps to keep my makeup on longer!
Then i used concealer around my tired eyes, sides of my nose (i have shocking sinuses so it's always red) and a little on my chin.
Next, i apply my liquid foundation and set it with a powder. For day to day wear i usually wear only the powder as it has great coverage on it's own, but this tutorial i used a liquid, too.
 
 
Now it's time to add some colour. With vintage pinup makeup your colour comes from your lips and cheeks. I used Blush #13. Note: (You can use a coloured eyeshadow, but usually it's kept to a very neutral colouring.)
 
 
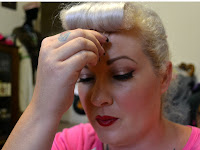
Now to fill in my brows...and take a cheeky photo of them :p
 
I use Boogie Woogie Brown along my crease and blend.
 
Then i put With A Wink And A Smile on my lids and over the top of the Boogie Woogie Brown.


Just under my brow i use Vanilla Malt to subtly highlight and blend down into the crease.
 
Add my wingtips...
 
...pop on some lashes (I'm wearing the Natural Lashes available from Dead Gorgeous Cosmetics)


 And a touch of mascara to bond my lashes to the falsies.
 
Next i line my lips...
 
And fill them in. I used Ruby Slippers (my FAVE red) but you could also use a pink. 
 
This is a soft and sweet look, perfect for everyday wear.
 
Stay tuned for my next post, i'll be doing a rolled/faux fringe :D

Out Of The Blue 'Shadow


To create this look I used these 4 Dead Gorgeous Cosmetics mineral eyeshadows:
 
1. Mint Julip 2. Blue Belle
3. 09sl 4. 08sl
  
Start by prepping your eyes using primer, concealer and the foundation


Next fill in your eyebrows (I've used Brow Dust #00)
 

Apply Mint Julip to the inner corner of your eyelid and then out toward the middle
 
 
Next apply Blue Belle to the outer corner and then inwards, blending as they meet
 
 
Now apply a little 09sl to the outer corner and blend into the Blue Belle
 
 
I've put 08sl ontop to deepen the colour
 
Under the brow bone apply Bare Wolf and blend downwards
 
Use a liquid liner to line along your top lashes
 
Now you can apply false lashes if you want, i used Thick Lashes (avail from Dead Gorgeous Cosmetics $5 for 10 pairs)
 
Finally, pop on some mascara and viola! You're done!
 
*Tip: For a gorgeous summery feel team this look with a pale pink lipstick or gloss


Monday, 21 January 2013

Want Perfect Brows???

Our eyebrows frame our face and give expression, letting everyone know if we're angry, sad, surprised etc. Unless you've had Botox then it's anyone's guess.

So, we need to give our eyebrows a lil help and enhance them by filling them in. I find pencils are way too harsh, and because our eyebrows aren't perfectly symmetrical, pencils tend to exaggerate this. I use a brow dust on myself and all my clients to create a much more natural look. This allows me more control as i can start with just a little powder on my brush, apply it and if i think the brow needs more, i can easily build up the colour.

Start by having your eyebrows professionally waxed, this will give you a fabulous shape to follow. Not everyone has an arch in the middle, some people have pretty straight eyebrows, some have a very noticeable arch. Go with what God gave you, there's no point trying to apply makeup to something that isn't there. As long as your eyebrows are neat, well groomed and filled in you'll be good to go.

You may also want to get your beautician to tint your eyebrows. If you have dark hair but naturally light eyebrows, you need to match the colour. You'll still need to fill them in, the tint will only dye the hair, filling them in colours the skin behind the hair giving a much more even colouring...especially if your brow hairs are sparce.

Here's what you need:
- Mirror
- Flat Angled Brush
- Brow Dust to match your hair colour (I've used Dead Gorgeous Cosmetics Brow Dust #00)


                                                               See the difference?